 Whether you’re caning your first chair or your fiftieth chair, you’ll be able to weave easier with this chair caning tip that makes the weaving go a lot smoother.
Weaver's Stain
 Click here to Buy Weaver's Stain
Why not use just any old leftover wood stains?
...because wood stains generally have POLYurethane in them. Polyurethane makes your basket and seat weaving hard and prevents them from breathing. Then they dr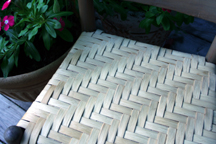 y out.
This stain is great stuff! It's not anything like using spray paint. The spraying radius is about 6" wide so you get quick, even coverage in a fine mist. No blobs. And the spray button is wide. You don't even need to wear gloves to protect your button finger!
The flat reed splint woven seat at left actually looks more like a hardwood when it's sealed with Weavers Stain "Clear".
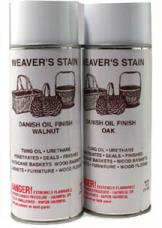
Beautiful results! Weaver's Stain, a Danish oil spray stain. This is a tung oil product with urethane. NO POLY-urethane! Spray it on for a finish that will definitely enhance the way your baskets look and last. 11 oz. can.
Colors: Oak, Walnut, Black Walnut, Clear, Driftwood and Maple. $9.45
Staining Tips from the Weaver's Stain manufacturer
These manufacturer's tips are directed towards baskets, but common sense will tell you how to apply to spraying a chair seat. Be careful not to spray the wooden part of your seat (unless you also want to seal the wood). Be sure that you don't allow anyone to sit on the chair until it's THOROUGHLY dry- certainly not for at least 24 hours, depending upon the weather.
We suggest that you begin with the BOTTOM of your seat.
Once your basket is completed and manicured, you're ready for the last step, which is staining.
Print these tips:
These tips will help you get the most baskets stained per can of Weaver's Stain.
Always stain outside or in a well ventilated area.
HOLD CAN APPROXIMATELY 10 INCHES FROM YOUR BASKET
1). Turn basket over and spray the bottom first.
2). Work your way up the outsides of the basket to the rim. By this time, stain has penetrated to the inside and you need only mist the inside of your basket.
3). Spray the inside of your basket.
4). If you have a wood handle, spray the handle last and wipe with a cloth immediately. The longer the stain is on the wood handle, the darker the handle will be.
DO NOT spray the same area twice.
Once you start spraying, keep the basket and the can moving. Your basket needs only 1 coat of stain.
Should you get more stain on one end of your basket than the other, do not wipe it to even it. It will even itself when it dries.
If stain is dripping from your basket, you are using way too much stain, or you are too close to your basket. If your basket is darker shade than normal, you are holding the can too close to our basket. The closer you hold the can to your basket the more intense the color.
You should be able to handle your basket after 15 minutes. However, let it dry 24 hours before actually using it.
Any odor will dissipate after a few days. If you let your basket dry outside, in the shade, the odor will disappear sooner (during warm weather only).
If it is damp or wet outside, it will take longer for your basket to dry. If possible bring your basket inside where it is warm and let it dry (place on a plain brown paper bag).
You may wish to use a wire coat hanger when staining. Open up the hanger and hook your basket to one end and hang from a tree. This way you can walk around your basket when staining.
We recommend that you take a large appliance box and cut the flaps out, set the box on its side and you have a stain booth. Eliminates any over-spray problem.
Do not spray outside when it is below freezing, 32 degrees. The propellant breaks down in the cold and you are wasting your stain. You'll know when it is too cold, stain will come out in a stream.
If you have to spray a basket outside when it is below freezing, keep the can inside where it is warm. You may go out and spray your basket. Once the can becomes cold you will notice a stream of spray. STOP. Go back inside the let the can become room temperature again, then you may go out and finish your basket.
Do not spray on a windy day.
Do not spray next to your new car or next to your vinyl siding.
VERY IMPORTANT TIPS:
When finished, turn your can upside down and press nozzle for 1 or 2 seconds. This will allow the propellant to clean the cylinder and nozzle.
If the nozzle clogs, and it is a wide nozzle with a fat finger pad, you can remove this nozzle and soak it in mineral spirits for 15 minutes and rinse with water and place back on can. You're ready to stain again.